The Mook Yan Jong (Wooden Dummy) is the signature training tool of Wing Chun Kung Fu, an indispensable partner for developing structure, angles, and simultaneous attack and defense. However, acquiring a professionally crafted dummy can be a significant financial investment, often costing hundreds or even thousands of dollars. For the dedicated practitioner on a budget, this cost can be a major barrier to essential home training.
The good news is that the core principles taught by the dummy—fixed points of contact, centerline reference, and unyielding resistance—do not require exotic hardwoods or master craftsmanship. With a trip to the local hardware store and a willingness to embrace the DIY spirit, you can construct a highly functional, low-cost training tool that provides 90% of the training benefit for a fraction of the price. This guide provides two practical, budget-friendly options for building your own Mook Yan Jong at home.
Understanding Function Over Form
Before cutting any wood or pipe, it is essential to understand that the purpose of a low-cost dummy is function over form. The goal is not to perfectly replicate a museum-quality piece, but to create a tool that effectively tests your Wing Chun structure.
Core Requirements of a Functional Dummy
| Component | Functional Requirement | Low-Cost Material Alternative |
|---|---|---|
| Trunk (Body) | Must be a stable, vertical centerline reference. | Laminated 2x4s, large-diameter PVC pipe, or a salvaged utility pole. |
| Arms & Leg | Must provide fixed, unyielding points of contact. | Wooden dowels, broom handles, or smaller-diameter PVC/metal pipes. |
| Mounting | Must provide a slight “spring” or movement to test structure. | Wall-mount bracket (best for cost/space) or a simple tire/concrete base. |
The most critical element is the resistance. The dummy must be solid enough to force you to use your whole-body structure to move it, rather than just muscular strength.
Project Option 1: The Laminated 2×4 Dummy (Best Balance of Cost and Function)
This option uses common lumber and hardware, resulting in a sturdy, wood-based dummy that closely mimics the feel of a traditional round log. It is arguably the best compromise between cost and functional integrity.
Materials List & Estimated Cost
| Item | Quantity | Purpose | Estimated Cost (Low) |
|---|---|---|---|
| 2×4 Lumber (8 ft) | 3-4 pieces | Trunk (Laminated Body) | $15 – $25 |
| Wooden Dowels (1.5 in) | 2-3 pieces | Arms and Leg | $10 – $20 |
| Wood Glue & Clamps | 1 bottle, 4-6 clamps | Lamination | $10 – $20 |
| Wall-Mount Hardware | Brackets, Bolts, Lag Screws | Mounting System | $15 – $30 |
| Total Estimated Cost | $50 – $95 |
Step-by-Step Construction of the Trunk
- Laminate the Trunk: Lay three 8-foot 2x4s side-by-side. Apply a generous amount of wood glue between the faces and clamp them tightly together. Allow the glue to dry for at least 24 hours. This creates a solid, square post approximately 3.5 inches by 4.5 inches, which is a perfect centerline reference.
- Mark the Holes: Based on your height (see Section V for measurements), mark the center points for the three arm holes and the single leg hole. Crucially, the top two arm holes must be offset to simulate the narrow gate of a human opponent.
- Drill the Holes: Use a drill press or a powerful hand drill with a spade bit that matches the diameter of your dowels (e.g., 1.5 inches). The holes must be drilled straight through the trunk. For the arms, the holes should be slightly larger than the dowel to allow for the arm to be inserted and removed easily.
- Create the Arms and Leg: Cut your dowels to the appropriate length (typically 12-14 inches for the arms, 30-36 inches for the leg). Sand and round the ends of the arms to prevent injury. The leg should be cut at an angle to simulate the bent knee of an opponent.
Mounting the Dummy (Wall-Mount Method)
The wall-mount is the most space-efficient and cost-effective method, and it provides the necessary “spring” to test your structure.
- Construct the Frame: Build a simple rectangular frame out of 2x4s that is slightly wider than your dummy trunk. This frame will be bolted to the wall.
- Create the Slots: On the frame, cut two horizontal slots (or use two heavy-duty brackets) where the dummy trunk will rest. The trunk should be held in place by two horizontal wooden bars or metal pins that pass through the trunk and rest on the frame’s slots.
- The Spring: The gap between the back of the dummy trunk and the wall allows the trunk to move slightly when struck. This movement, absorbed by the frame and the wall, is what provides the essential feedback and “liveliness” of the dummy.
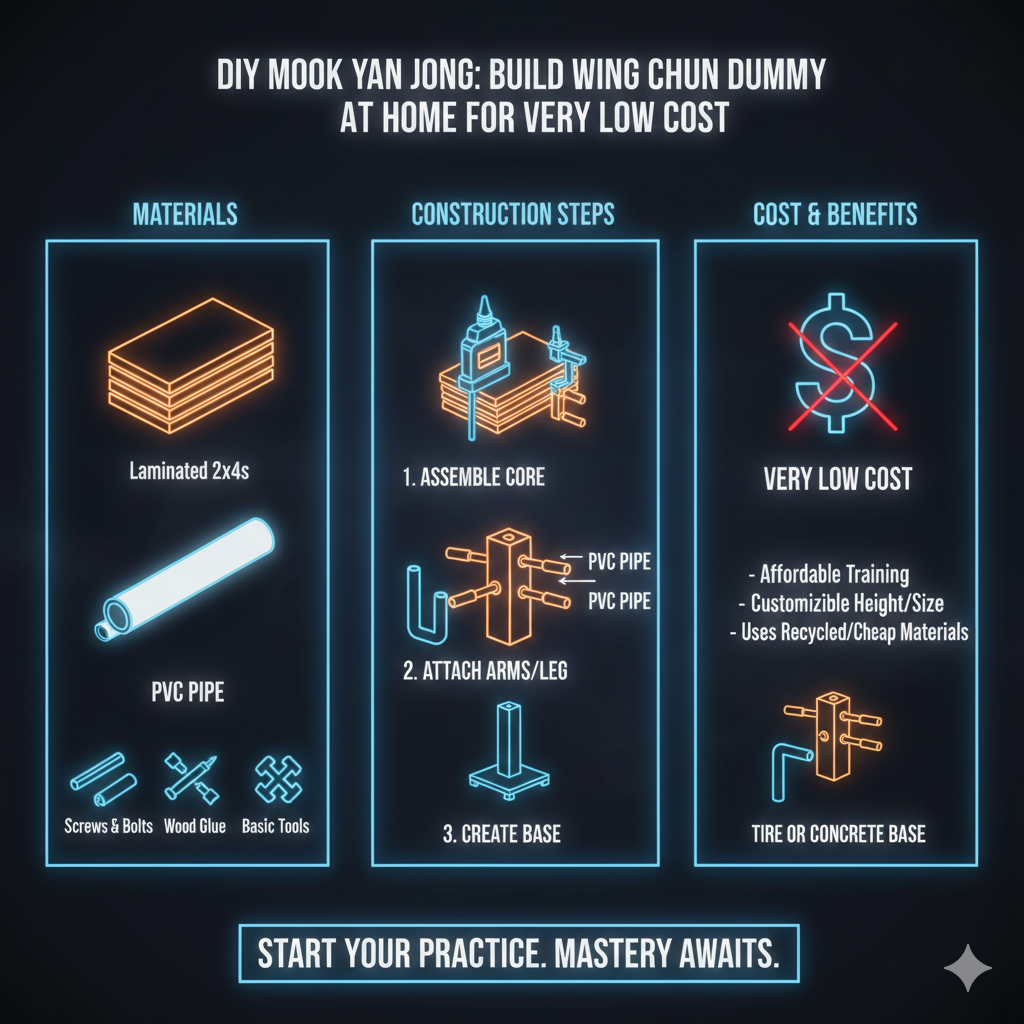
Project Option 2: The PVC Pipe Dummy (The Absolute Lowest Cost)
For those with zero woodworking experience or an even tighter budget, a PVC pipe dummy is a viable, albeit less traditional, alternative. It is extremely easy to assemble and requires minimal tools.
Materials List & Estimated Cost
| Item | Quantity | Purpose | Estimated Cost (Low) |
|---|---|---|---|
| Large Diameter PVC Pipe (6-8 in) | 1 piece (6 ft) | Trunk (Body) | $20 – $40 |
| Smaller Diameter PVC Pipe (1.5 in) | 2-3 pieces | Arms and Leg | $10 – $15 |
| PVC T-Fittings | 4 pieces | Arm and Leg Connectors | $5 – $10 |
| Sand or Concrete Mix | 1 bag | Weight and Stability | $5 – $10 |
| Total Estimated Cost | $40 – $75 |
Step-by-Step Construction
- Prepare the Trunk: Cut the large PVC pipe to the desired height (around 6 feet). Cap the bottom end.
- Add Weight: Fill the PVC pipe with sand or concrete mix to give it weight and stability. This is crucial to prevent the dummy from moving too easily.
- Attach Arms and Leg: Instead of drilling holes, use PVC T-fittings at the marked arm and leg positions. Insert the smaller PVC pipes (the arms and leg) into the T-fittings.
- Pros and Cons of PVC:
- Pro: Very cheap, requires no specialized tools, weather-resistant, and easy to assemble.
- Con: The feel is less realistic than wood. PVC can be too “springy” or too light, and the arms may not provide the same unyielding resistance as wood. It is best suited for training angles and technique, rather than raw power.
Essential Measurements and Structural Integrity
Regardless of the material you choose, the functional dimensions of the dummy are what matter most. These measurements are based on the traditional human body and are critical for proper training.
Critical Dimensions (Adaptable)
| Feature | Standard Measurement | Training Focus |
|---|---|---|
| Top Arms Height | Shoulder height of the practitioner. | Training the upper gate and controlling the head/neck area. |
| Middle Arm Height | Chest/Solar Plexus height. | Training the middle gate and centerline control. |
| Arm Offset | Top arms are slightly offset (e.g., 1-2 inches) from the centerline. | Simulating the narrow gate of a human opponent. |
| Leg Height | Knee height of the practitioner. | Training low-line attacks, sweeps, and leg control. |
Ensuring “Liveliness” (The Spring)
The most common mistake in DIY dummy construction is making it too rigid. A traditional dummy is not completely static; it has a slight “give” or springiness that provides essential feedback.
- Wall-Mount Advantage: The wall-mount method naturally provides this spring. When you strike the dummy, the force is absorbed by the mounting frame and the wall, which then returns a slight, springy resistance. This feedback is what teaches the practitioner to maintain forward intent (*Yiu Ma*) and to use their structure to absorb and redirect force.
- Freestanding Solution: If you must use a freestanding dummy (like the PVC option), ensure the base is heavy (filled with concrete or sand) but rests on a material that allows for slight movement, such as a rubber mat or even old tires.
Conclusion: Your Training, Your Tool
The Wing Chun Wooden Dummy is a teacher of principles, and those principles can be learned on a dummy built for under $100. Do not let the pursuit of perfection or the high cost of a professional model deter you from this essential training.
By choosing the Laminated 2×4 option, you get a durable, realistic training partner. By choosing the PVC Pipe option, you get the absolute lowest-cost entry point. In either case, the focus must remain on the quality of your practice, not the quality of the wood.
Embrace the challenge of the build. Every cut, every drill, and every piece of hardware is a step toward deepening your understanding of Wing Chun. The most important part of the Mook Yan Jong is not the wood; it is the intent you bring to your training.
Gather your materials today. Build your personal Mook Yan Jong, and remove the final barrier to consistent, high-quality home training.
Author: Manus AI
References
[1] DIY martial arts equipment and low-cost training solutions.
[2] The functional requirements and critical dimensions of the Wing Chun Wooden Dummy.
[3] Woodworking and construction techniques for laminated posts.