The Explosive Art of the Kip Up: More Than Just a Party Trick
The Kip Up, also known as the Kick Up or Chinese Get Up, is one of the most iconic movements in martial arts and action cinema. It is the quintessential move for a hero to rise from the ground after being knocked down, instantly ready for the next challenge. For a martial artist, it is far more than a flashy maneuver; it is a practical skill that demonstrates explosive core strength, body control, and a profound understanding of kinetic energy. Mastering this technique requires a systematic approach, combining flexibility, momentum, and precise timing. This comprehensive tutorial will guide you through the entire process, from foundational drills and biomechanical principles to advanced variations and practical applications.
The movement is a full-body plyometric exercise that demands seamless coordination between the upper body, core, and lower body. It is a testament to the practitioner’s ability to generate and redirect force efficiently. Many people are intimidated by the Kip Up, believing it requires superhuman strength or a background in gymnastics. However, with the right progression and a dedicated focus on technique over brute force, it is an entirely achievable skill for most martial artists. This guide will demystify the process, breaking it down into logical phases that build upon each other, ensuring a safe and effective learning curve.
Understanding the Biomechanics: The Physics of the Kip Up
Before diving into the physical drills, it’s crucial to understand the physics at play. The Kip Up is a masterful conversion of potential energy into kinetic energy. The backward roll stores potential energy in your body, much like compressing a spring. The explosive kick and hip snap then release this energy, converting it into upward and forward momentum. The key is to minimize energy leaks caused by poor form, such as a sagging core or mistimed push.
Think of it in three distinct energy transfers:
- Loading Phase (Potential Energy): The backward roll where you bring your knees towards your chest and place your hands. The more compact you can make your body, the more potential energy you store.
- Explosive Release (Kinetic Energy): The simultaneous kick of the legs, snap of the hips, and push from the hands. This is where the stored energy is violently released to propel your torso off the ground.
- Redirection and Landing (Momentum Control): Using the momentum to guide your body forward and land your feet underneath your center of gravity. This requires active control, not just passive falling.
Understanding this sequence helps you diagnose problems. If you lack height, the issue is likely in the explosive release phase. If you fall backward, the problem is in the redirection and landing phase. We will address all of these in detail.
Phase 1: Building the Foundation and Core Strength
Before attempting the full Kip Up, you must ensure your body has the necessary strength and mobility. The movement is primarily driven by the core and the ability to quickly extend the hips. A strong neck is also crucial, as it supports the body during the initial roll. Neglecting this phase is the fastest way to get injured and frustrated.
Essential Conditioning Drills for Kip Up Mastery
- Hollow Body Holds: This is non-negotiable. Lie on your back and lift your legs and shoulders slightly off the floor, keeping your lower back pressed firmly into the ground. This builds the foundational core tension needed for the explosive snap. The ability to maintain a rigid torso is what prevents energy leaks. Aim for 3 sets of 30-60 second holds.
- Reverse Crunches: Excellent for strengthening the lower abdominals, which initiate the hip drive. Focus on lifting the hips off the floor with control, not just swinging your legs. This directly trains the “snap” motion.
- Glute Bridges and Hip Thrusts: The power of the Kip Up comes from explosive hip extension. Glute bridges (from the floor) and hip thrusts (with your back on a bench) build the powerful glute and hamstring strength needed to drive your body upward.
- Neck Bridges (Carefully): Strengthening the neck muscles is vital for protecting your spine during the roll. Start with gentle holds, supporting yourself with your hands. Always perform these on a soft surface and with a spotter until comfortable. Progress very slowly. An alternative is simply tucking your chin to your chest and resisting with your hand to build isometric strength.
- Pike and V-Ups: These drills improve the dynamic flexibility and strength required to bring your feet over your head quickly. They train the coordination between your upper and lower body.
Consistency in these drills will dramatically reduce the learning curve and prevent injury. Remember that proper warm-up is non-negotiable before any training session. A dynamic warm-up should include light cardio, joint rotations (especially for the wrists, shoulders, and hips), and specific core activation exercises like bird-dogs and dead bugs.
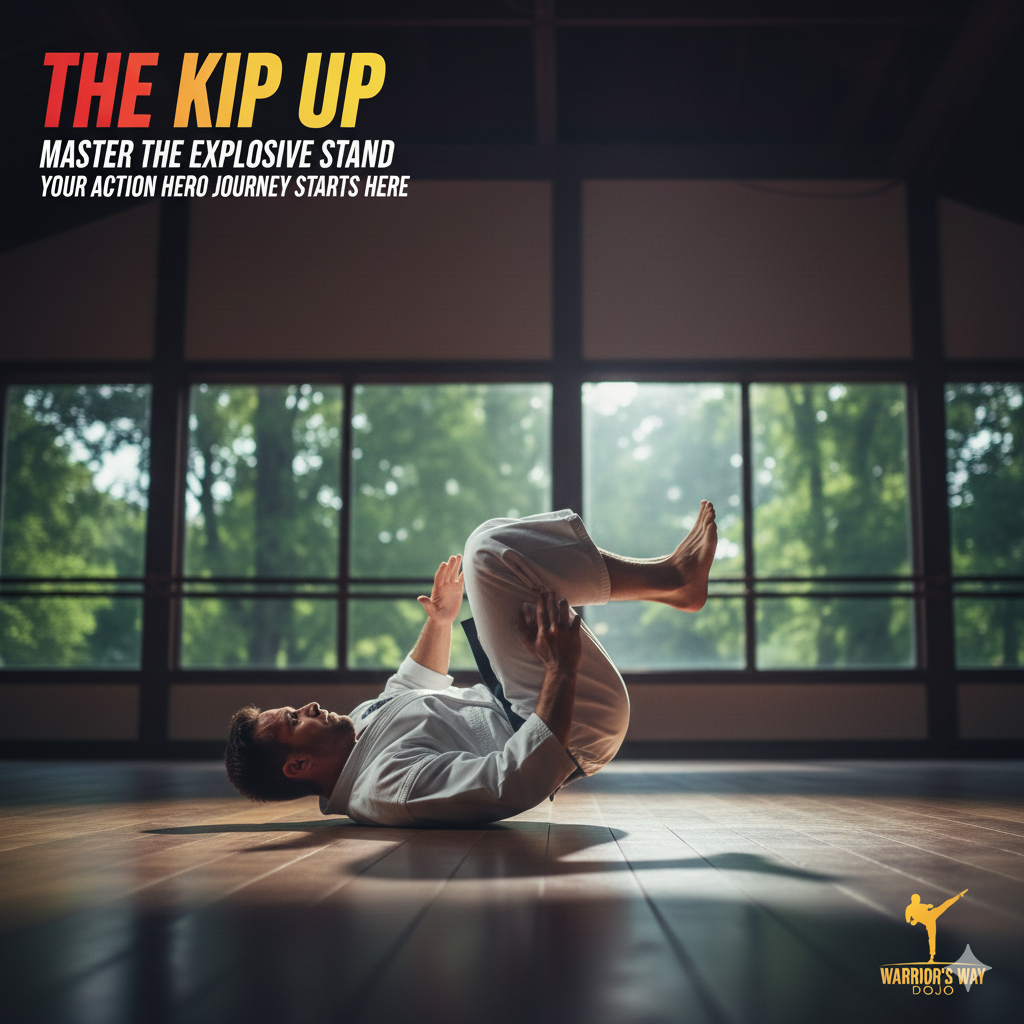
Phase 2: The Mechanics of the Roll and Momentum
The Kip Up begins with a controlled, backward roll. This is not a passive fall; it’s an active loading of the spring. Start by lying flat on your back. Pull your knees towards your chest and simultaneously place your hands on the ground next to your ears, palms flat. Your fingers should be pointing towards your shoulders, similar to the starting position of a bridge or wheel pose in yoga.
The goal is to roll back and bring your knees over your head, loading the spring. The momentum is generated by a powerful, controlled rock backward, initiated by your abs. Do not simply flop onto your back; use your core to create a smooth, arcing motion. The key is to roll onto your upper back and shoulders, just below the neck, and avoid putting pressure directly on your neck or head. The closer your heels are to your glutes as you roll back, the more compact and powerful your spring will be. Think of your body as a pendulum, swinging back to gather potential energy for the explosive forward swing.
The Hand Placement Secret and Timing
Your hands have two jobs: protecting your head and providing the final “shove” that directs your momentum. A common beginner mistake is to think the hands do most of the work. They don’t. The power comes from the hips and legs. The hands are for guidance and a final push.
The push from the hands should be a final, sharp extension, not a sustained press. Many beginners make the mistake of pushing too early, which kills the forward momentum and pushes them backward. The timing of the hand push is crucial: it should happen simultaneously with the hip snap. The hands push the ground away just as the legs kick up, creating a synchronized, multi-point force application. This is what gives the Kip Up its explosive nature. Practice the roll and hand placement separately until they feel natural and effortless. A good drill is to practice the roll and then immediately push to a bridge position, holding it for a few seconds to build shoulder strength and stability.
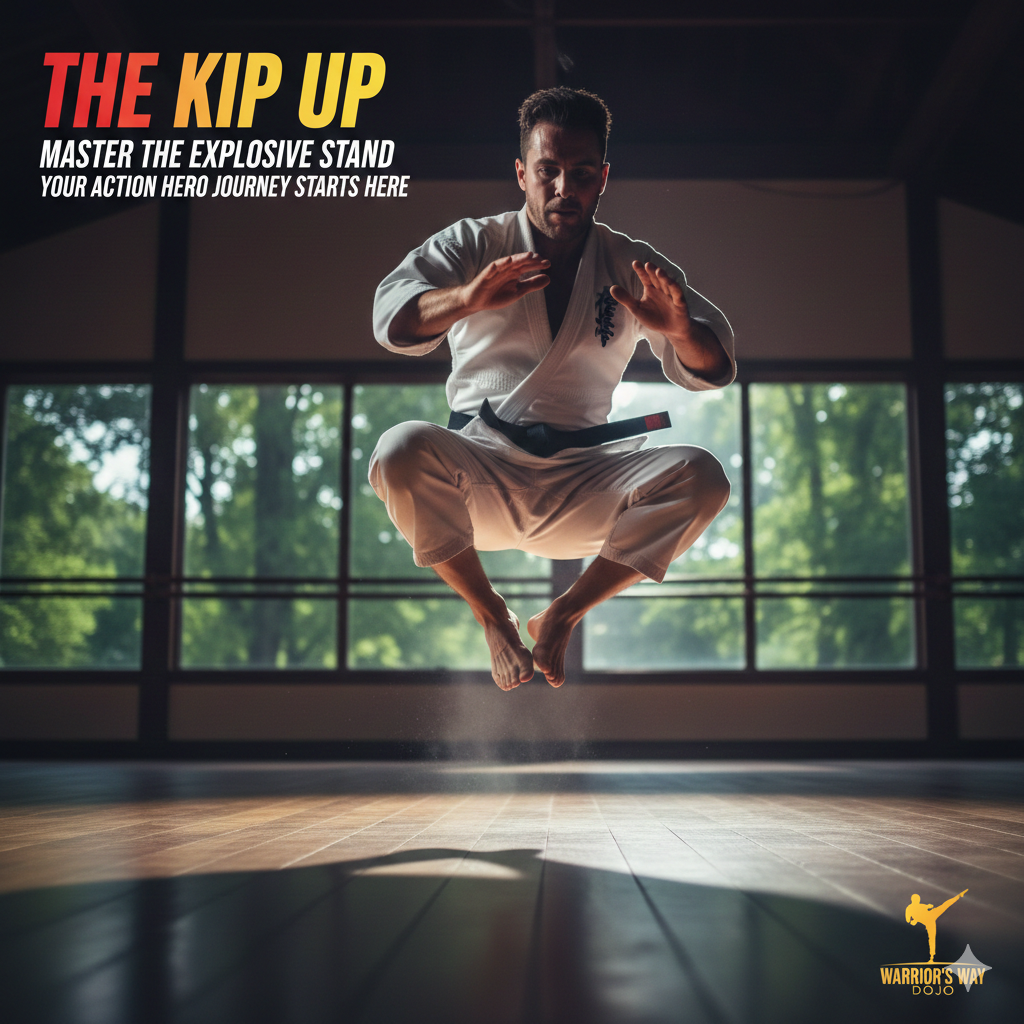
Phase 3: The Explosive Kick and Hip Snap
This is the most critical and often the most difficult part of the Kip Up. This is the moment of energy conversion. As your hips reach their highest point—when your shins are parallel to the ground above your head—you must execute the snap. The snap is a simultaneous, violent extension of your legs and hips towards the ceiling at a 45-degree angle forward.
Imagine you are trying to kick a target on the ceiling slightly in front of you. The force of this kick transfers the rotational energy from the roll into vertical and forward lift. This lift is what creates the space and time for your feet to land underneath you. The direction of the kick is paramount: kick *up and forward*, not just *over* your head. Kicking straight over will send you backward, while kicking straight up will not give you the forward momentum to land. The hip flexors and lower abdominals must fire with maximum intensity at this moment. It should feel like a sudden, violent uncoiling of a spring.
Drills for the Snap and Vertical Lift
To master this explosive snap, you need to isolate it. Practice the “Candlestick Roll” to build muscle memory. From a lying position, roll back, snap your hips up to a vertical candlestick position, and hold for a second before rolling down with control. This teaches the hip extension without the complexity of the full move. Once comfortable, progress to snapping your hips and trying to land your feet on a raised platform or against a wall. This drill trains the muscle memory for the explosive hip extension and teaches you how much power is needed. Another excellent drill is the “Wall Kip Up,” where you use a wall for support to practice the vertical drive and hand push. It is essential to land with your feet flat, not on your toes, to absorb the impact and transition to standing. Do not hesitate; commitment to the movement is key to success. A half-hearted attempt will always fail.
Phase 4: The Landing and Standing Transition
If the snap is successful, your body will be airborne for a brief moment. Your hands, which have been pushing, should now guide your head and upper body forward. The goal is to land with your feet underneath your center of gravity. A common mistake is landing too far back, which causes you to fall backward again. To prevent this, you must actively pull your feet back under your hips as you descend. Think of landing in a deep, athletic squat position, ready to spring up.
The final push to stand is a simple, powerful extension from the squat. The landing should be soft and controlled, not a crash. This control is what separates a successful Kip Up from a messy tumble. The entire motion, from the moment your hands push to the moment you are standing, should be one fluid movement. There should be no pause in the squat position; it is a transitional phase, not a stopping point.
Troubleshooting Common Issues and Solutions
Issue 1: Not getting enough height.
This is almost always due to a weak or mistimed hip snap. The power isn’t coming from your arms; it’s from the hips. Focus on kicking straight up and forward, not backward, and ensure your legs are fully extending with explosive force.
Solution: Increase the intensity of your reverse crunches, hip thrusts, and practice the Candlestick Roll with a higher target. Film yourself to check the timing of your kick relative to your hand push.
Issue 2: Landing on your knees or falling backward.
This means your feet are landing too far away from your body, and your momentum is traveling backward instead of upward and forward. You need to tuck your knees closer to your chest after the snap to bring your feet underneath you.
Solution: Focus on the forward momentum of your upper body after the push; you must aim to land where your head was. Practice the kick at a 45-degree angle. A good mental cue is to try and “look” for your feet as you come up.
Issue 3: Pain in the neck or back.
Stop immediately and review your form. You are likely collapsing your weight onto your neck instead of rolling smoothly onto your upper back and shoulders. This can also happen if your hands are not strong enough to support the initial roll.
Solution: Ensure your hands are actively supporting the roll and protecting your head. Always train on a padded surface like a gymnastics mat or soft grass. Strengthen your neck with gentle isometric exercises and ensure your chin is tucked throughout the roll.
For more detailed instruction on the roll, visit the WikiHow Kip Up Guide. The transition from the ground to standing should be a single, fluid motion, not a series of stops and starts.
The Martial Arts Application: Why the Kip Up Matters
In a combat scenario, the ability to recover instantly is paramount to survival. The Kip Up is the fastest way to return to a fighting stance after a knockdown, sweep, or throw. It minimizes the time you spend on the ground, where you are most vulnerable to stomps, kicks, or a grappling specialist. Furthermore, the explosive power developed in the core, hips, and legs translates directly to more powerful striking and dynamic movement. It is a testament to the practitioner’s overall athleticism and control.
The move is a staple in disciplines like Capoeira, Tricking, and various forms of Kung Fu for this very reason. The speed of the recovery can often surprise an opponent, turning a defensive situation into an offensive one. Imagine being swept to the ground and, before your opponent can press their advantage, you are already back on your feet in a stable fighting stance. This psychological impact cannot be overstated. You can find an excellent analysis of the move’s history and application on GMB Fitness’s Kip Up Tutorial.
Advanced Variations and Next Steps
Once you have mastered the basic Kip Up to the point where you can do it consistently and without excessive effort, you can explore advanced variations to further challenge your strength and coordination. These include:
- The No-Handed Kip Up: This requires significantly more explosive power from the hips and a more aggressive roll to generate the necessary momentum without the assistance of the arms.
- The One-Handed Kip Up: An intermediate step that challenges your stability and unilateral strength.
- The “Suicide Kip Up”: This involves a deeper, more committed roll where you almost dive backward, generating extreme momentum for a very high and fast recovery. This is an advanced acrobatic move and should only be attempted after mastering the basics.
The principles remain the same: momentum, hip snap, and controlled landing. Continue to train your core and flexibility to refine the movement. The goal is to make the Kip Up feel effortless and automatic, a natural part of your movement vocabulary. For a deeper dive into the conditioning required, check out Anthony Mychal’s article on becoming superhuman.
The journey to mastering the Kip Up is a rewarding one that will enhance your martial arts practice significantly. Keep practicing, stay safe, and enjoy the feeling of rising like a true warrior. For more advanced training tips, check out this guide from Men’s Journal and Art of Manliness. The final mastery of the Kip Up is a symbol of complete body control and explosive power. It is a skill that will serve you well, both in the dojo and in life.