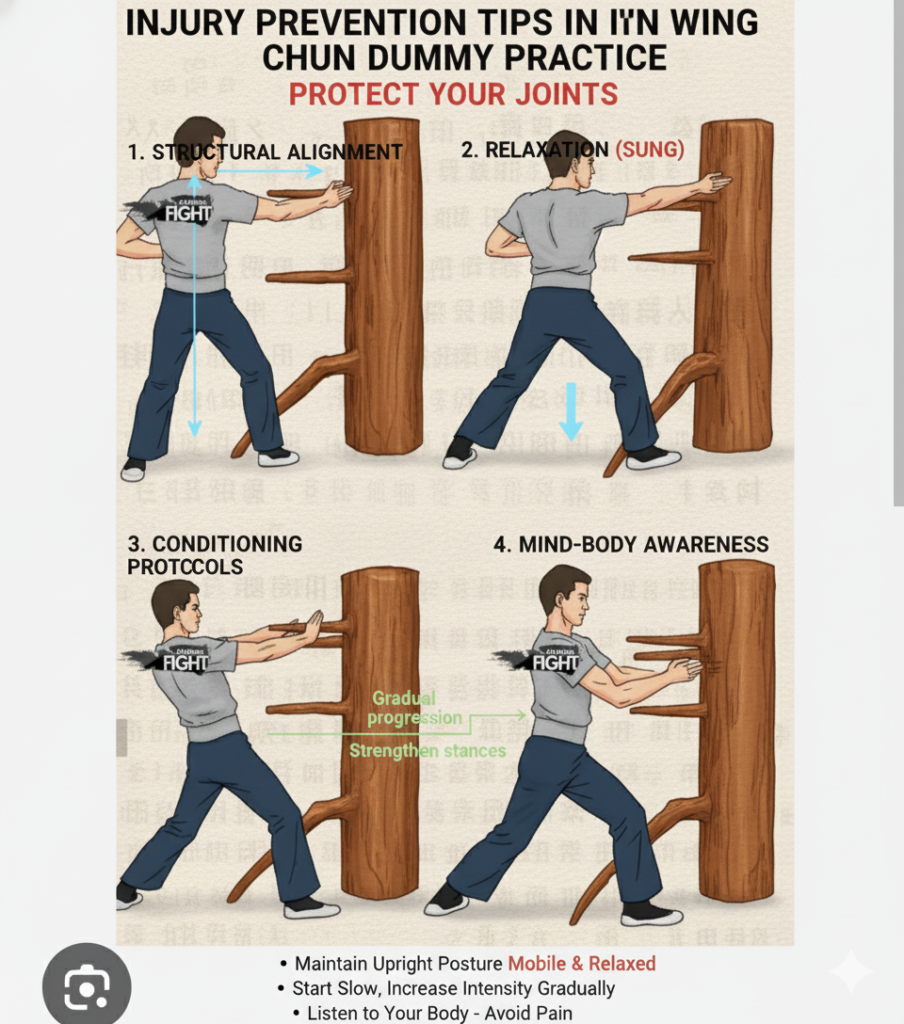
Build (Wing Chun dummy) a traditional Chinese martial art that emphasizes close-range combat and efficiency in movement.
Known for its practical and straightforward techniques, Wing Chun is designed to enable practitioners to defend themselves effectively.
The art places a strong focus on stance, structure, and the ability to deliver powerful strikes while maintaining balance and control.
One of the key components of Wing Chun training is the use of specialized tools that help practitioners refine their skills.
Among these tools, the Wing Chun dummy, or ‘Muk Yan Jong,’ holds a significant place.
The Wing Chun dummy is an indispensable training apparatus that allows martial artists to practice and perfect their techniques.
It features a wooden frame with three protruding arms and a leg, simulating an opponent.
By training with the dummy, practitioners can work on their form, precision, and coordination, enhancing their overall proficiency in Wing Chun.
However, traditional Wing Chun dummies can be prohibitively expensive, making them inaccessible for many enthusiasts.
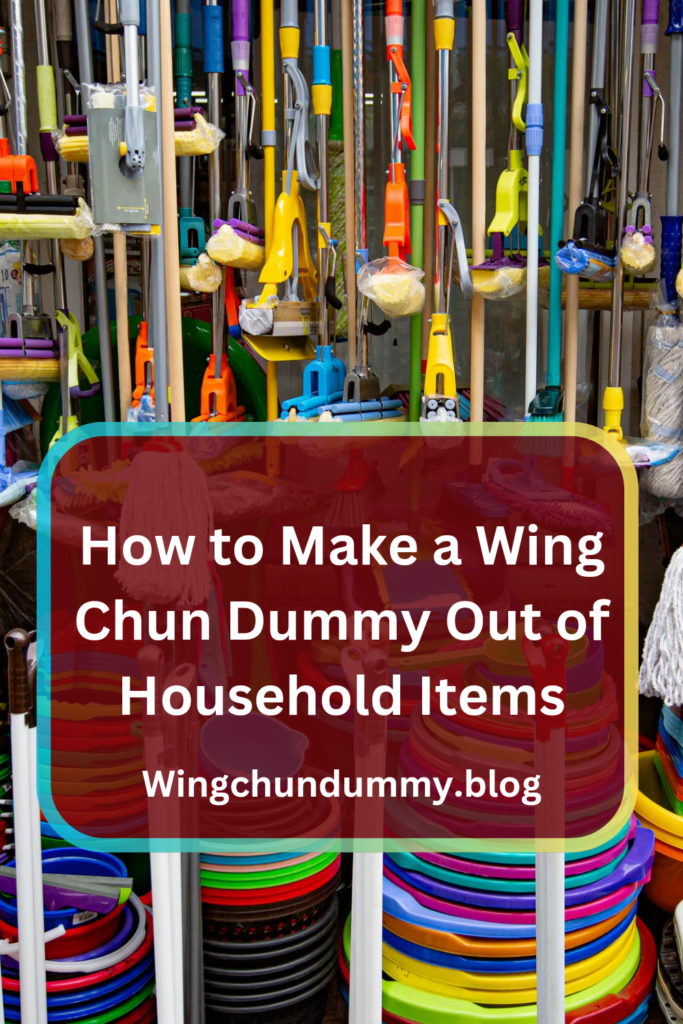
This is where the ingenuity of creating a homemade Wing Chun dummy comes into play.
Using readily available household items, it is possible to construct a functional training tool that mimics the essential features of a Muk Yan Jong.
This guide aims to provide step-by-step instructions on how to build your own Wing Chun dummy, allowing you to practice and improve your skills without the need for costly equipment.
So, let’s build Wing Chun dummy from house 🏠 🏡 Hold item’s.
Materials Needed

Constructing a Wing Chun dummy using household items can be an efficient and cost-effective solution for martial arts enthusiasts.
The materials required are commonly found around the home or easy to acquire.
Here is a detailed list of the necessary items, along with their roles in the construction process:

PVC Pipes: These pipes serve as the primary structure of the Wing Chun dummy. PVC pipes are chosen for their durability and ease of cutting and assembling.
Typically, a combination of 6-inch and 4-inch diameter pipes will be used to create the body and limbs of the dummy.
Wooden Dowels: Wooden dowels will form the arms and legs of the dummy. They are selected for their sturdiness and ability to withstand repeated strikes.

Dowels of varying diameters, usually around 1.5 to 2 inches, will be required to replicate the dimensions of a traditional Wing Chun dummy.
Old Tires: Tires are an excellent material for the base of the dummy.
They provide the necessary weight and stability, ensuring that the dummy remains stationary during practice.

Two to three old tires stacked together can create a solid foundation.

Screws and Brackets: These are essential for securing the various parts of the dummy together.
Screws will fasten the PVC pipes and wooden dowels, while brackets will provide additional reinforcement and stability to the structure.
Padding: Padding materials such as foam or old cushions are used to cover the arms and body of the dummy.
This padding protects the practitioner’s hands and feet during training, reducing the risk of injury while maintaining the realistic feel of a traditional Wing Chun dummy.

By utilizing these household items, you can create a functional and durable Wing Chun dummy that closely mimics the traditional versions used in martial arts training.
Each material plays a crucial role in ensuring the dummy’s effectiveness and longevity, making your practice sessions both safe and productive.
Planning and Design
When embarking on the project of building a Wing Chun dummy from household items, the initial planning and design phase is crucial for ensuring both functionality and durability.
The traditional Wing Chun dummy, or “Muk Yan Jong,” is characterized by specific dimensions and proportions that facilitate effective training.
Typically, the dummy stands around 5 feet 6 inches to 5 feet 9 inches tall, with arms and legs positioned to simulate a human opponent.
These measurements can be adjusted slightly based on the user’s height and reach, but maintaining proportional accuracy is paramount.
Begin the planning process by sketching a detailed design of your Wing Chun dummy.
This visual representation will guide you through the construction phase, ensuring all components are accurately size and position.
Pay attention to the placement of the arms and leg, as these are integral to replicating the movements and techniques practiced in Wing Chun.

The arms are usually space 12 inches apart, with the top arm position approximately 10 inches from the top of the dummy.
The leg should protrude around 18 inches from the base, angled slightly downward.
Next, consider the space where the dummy will be set up.
Ideally, you should allocate an area that allows for unrestricted movement around the dummy, enabling comprehensive practice of Wing Chun techniques.
A clear space of at least 6 feet by 6 feet is best to ensure you can move freely and safely.
Additionally, ensure the area can support the weight and stability of the dummy, which may involve securing it to a wall or a sturdy stand.
Incorporating these considerations into your design will not only make the construction process smoother but will also result in a more authentic and effective training tool.
By carefully planning and designing your Wing Chun dummy, you set the foundation for a rewarding and practical martial arts practice right at home.
Constructing the Frame
Creating the frame for a Wing Chun dummy from household items is a practical and rewarding project.
To get started, you will need PVC pipes or wooden dowels, a saw, measuring tape, connectors, and a drill.
These materials are not only accessible but also ensure that your dummy is both cost-effective and durable.
Begin by measuring and cutting the PVC pipes or wooden dowels to the appropriate lengths.
A standard Wing Chun dummy frame typically requires three vertical posts and four horizontal crossbars.
The vertical posts should be around five feet tall, while the horizontal crossbars should be approximately two feet long.
Use a saw to make clean, precise cuts to ensure the stability of the frame.
Next, assemble the frame by connecting the vertical posts to the horizontal crossbars using PVC connectors or wooden joints.
For PVC pipes, use T-connectors to attach the crossbars to the vertical posts.
If you are using wooden dowels, drill holes at the connection points and secure the joints with screws or wood glue for add stability.
Ensure that the frame is level and balanced during assembly to prevent any wobbling or instability during use.
Safety is paramount during this process.
Always wear protective gear, such as safety goggles and gloves, when cutting and assembling the materials.
Work in a well-ventilated area to avoid inhaling any dust or fumes.
Additionally, double-check all connections and joints to ensure they are secure and will withstand the rigors of training.

Once the frame is assembled, test its durability by applying pressure to various points.
The frame should remain stable and upright, indicating that it is ready for the next steps in creating your Wing Chun dummy.
By carefully following these steps and adhering to safety guidelines, you can construct a robust and reliable frame for your Wing Chun dummy using household items.
Creating the Arms and Leg
Constructing the arms and leg of a Wing Chun dummy using household items demands precision and creativity.
Begin by selecting sturdy materials such as wood dowels, PVC pipes, or even broom handles for the arms.
Each arm should be approximately 24 to 30 inches long, allowing them to extend adequately from the dummy’s main frame.
To replicate the traditional tapering of Wing Chun dummy arms.
Consider sanding one end of each arm to achieve a gradual reduction in diameter.
The attachment of the arms to the main 🖼️ frame 🪟 is crucial for stability and functionality.
Drill holes through the main frame at shoulder height, ensuring they are evenly spacing and aligning.
Insert the arms through these holes and secure them using screws, bolts, or even strong adhesive if necessary.
The arms should protrude at an angle, typically around 45 degrees, to simulate the correct Wing Chun training posture.
For added stability, reinforce the joints with metal brackets or additional wooden supports.
Next, create the leg of the dummy using a wooden beam, PVC pipe, or a metal rod, around 36 to 40 inches in length.
The leg should attach lower on the main frame, usually about knee height, to mimic the traditional Wing Chun dummy structure.
Drill a hole in the main frame at the desired height and insert the leg component.
Secure it similarly to the arms, ensuring it is firmly attached and capable of withstanding impact.
Adjust the leg to angle slightly forward, about 15 to 20 degrees.
To replicate the authentic stance used in Wing Chun training.
Finally, ensure that all components are securely fast and check for stability.
Adjust the angles and positioning of the arms and 🦵 leg 🍗 need to closely mimic the traditional Wing Chun dummy setup.
This accurate positioning is essential for effective practice.
Enabling practitioners to train realistically and develop their skills efficiently.
By using household items creatively, constructing a functional Wing Chun dummy becomes an achievable task, fostering continued martial arts training at home.
Adding Padding and Finishing Touches
Adding padding to your Wing Chun dummy is essential to ensure both the longevity of the dummy and the safety of the practitioner.
Proper padding minimizes the risk of injury during training by cushioning the impact.
Making your practice sessions more effective and safer.
Various materials can be used for padding, each offering unique benefits.
Foam, for instance, is a popular choice due to its excellent shock 🙀 absorption properties.
Old clothes, on the other hand, are an economical and sustainable option.
Easily repurposed to provide adequate cushioning.
To start, you need to wrap the chosen padding material around the contact points of the dummy.
Particularly the arms and the central trunk.
If using foam, cut it into strips or sheets can be layer and wrap 🌯 around these areas.
Secure the foam with duct tape or strong adhesive strips.
Ensuring it is tightly bound to avoid shifting during use.
For old clothes, cut them into manageable pieces and wrap them in a similar fashion.
Securing them with tape or by tying them firmly around the dummy.
When wrapping the padding, it is crucial to maintain uniform 🥋 thickness.
Uneven padding can lead to inconsistent impacts.
Which may not only hinder your training effectiveness but also increase the risk of damage to the dummy or yourself.
If using multiple layers, make sure each layer is smooth 😀 and tightly wrapped before applying the next one.
This helps in creating a solid 🪨 and even surface, mimicking the consistency of a professional Wing Chun dummy.
Finishing touches can significantly enhance both the durability and aesthetics of your Wing Chun dummy.
Consider covering the pad 🪵 areas with a durable fabric like canvas 🎨 or leather.
This extra layer not only protects the padding material from wear and tear.
But also gives the dummy a more finished and professional appearance.
Additionally, you might want to paint or stain any expose wood to protect it from moisture and add a polished look.
By carefully adding and securing padding, and applying thoughtful finishing touches.
You can create a Wing Chun dummy that is both functional and visually appealing.

ensuring a safe and effective training experience.
Testing and Adjustments
After constructing your Wing Chun dummy from household items.
It is crucial to test its functionality and stability before incorporating it into your regular training routine.
Start by performing basic Wing Chun exercises such as the Pak Sau (slapping hand) and Tan Sau (palm-up hand).
These initial drills will help you determine the sturdiness of your dummy and whether it can withstand repetitive strikes.
Pay close attention to how the dummy responds to each movement.
Any excessive wobbling or instability indicates areas that may require reinforcement.
Next, conduct more dynamic drills like the Chi Sau (sticky hands) exercise.
Which involves continuous contact and sensitivity training.
This will further test the dummy’s resilience and ensure that it can support more complex techniques.
If you notice any parts of the dummy shifting or loosening, consider tightening the connections or adding additional support structures.
Such as extra screws or adhesive tape, to enhance stability.
Evaluating the dummy’s padding is also essential.
Ensure that the arms and body sections are to absorb impact and reduce wear and tear.
If the padding appears insufficient, add more layers using materials like foam or old clothing to provide better protection and extend the dummy’s lifespan.
Finally, practice a complete form such as the Muk Yan Jong (Wooden Dummy Form) to comprehensively assess the dummy’s performance.
This will help you identify any remaining issues that may need addressing.
Making these adjustments early on will significantly improve the dummy’s functionality and durability.
Ensuring it becomes a valuable tool in your Wing Chun practice.
Benefits of a Homemade Wing Chun Dummy
Creating a homemade Wing Chun dummy offers numerous advantages for practitioners, primarily in cost savings.
Commercially available Wing Chun dummies can be quite expensive, often running into hundreds or even thousands of dollars.
By utilizing household items, you can significantly reduce these expenses while still constructing a functional training tool.
This budget-friendly approach allows more individuals to access the benefits of Wing Chun training without the financial burden.
Another significant benefit is the customization options available when building your own dummy.
Unlike pre-manufacture dummies, which come in standard sizes and designs.
A homemade dummy can be adjust to fit your personal training needs and preferences.
Whether you need to adjust the height, arm length, or overall structure.
The flexibility in design ensures the dummy is perfectly suite for your specific requirements, enhancing the efficacy of your training sessions.
The process of building a Wing Chun dummy also brings a sense of accomplishment and satisfaction.
Engaging in the construction not only hones your practical skills but also deepens your connection to the martial art.
The hands-on experience fosters a greater appreciation for the traditional training tools and techniques, enriching your overall Wing Chun practice.
Additionally, the creative process can be rewarding and enjoyable.
Adding another layer of personal investment to your training routine.
Finally, creating and customizing a Wing Chun dummy.
Invites the opportunity to share your experiences and innovations with the broader Wing Chun community.
By exchanging ideas, modifications, and construction tips.
You can contribute to the collective knowledge and support fellow practitioners in their training journeys.
Engaging with the community in this way can lead to valuable insights, camaraderie.
And continuous improvement in your martial arts practice.